When a craft work space is as much display as it is function, you want your tools to be stored in an attractive manner. What better way to accomplish this than a few gold sprayed jars? Pretty, practical, mostly free, and it adds some sparkle? Why yes please!
Start by collecting a variety of reused jars. Keep jars that vary in size, shape, and have interest.
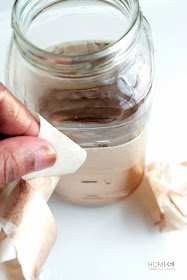
Use painters tape to tape off the area you do not want painted.
Experiment with creating different designs by what you choose to leave exposed. You may choose to paint the top of one jar, but the bottom of another.
I am using Krylon's Gold Metallic spray paint on most of my jars, which I am in love with and has more of a copper hue. I am also using Rust-oleum's Bright Metallics Gold on the rest, which gives me more a true golden hue.
Be sure to do one light coat from a little distance and allow it to dry before doing a second coat...you don't want the paint to drip or pool by the tape otherwise the paint will peel when you remove the tape. Finish with a clear coat for durability and protection (optional).
While most of the jars have a solid covering of paint, I like to see a little variance and chose to spray at a couple jars at an angle which allowed some of the creases and edges to to still show clear creating a design of its own.
Looking to add a little more design than spray paint can offer? Try using gold acrylic craft paint. I painted these little dots with a small paint brush, and sealed with clear spray paint.
What lovelier way to upcycle and store necessary items? It is like turning your tools into decor.
Happy Spraying!
See the rest of this bookcase & styling here.
Linky Love


So very lovely. I love the last picture of all the metallics. Just pinned that beauty!
ReplyDeleteWhat a fun project! They look fabulous!
ReplyDeleteThank you Stacy! And thanks for hosting such a fun link-up! ;)
DeleteI agree with Amy W, that last photo is very inspiring! Love the way they turned out!
ReplyDeleteSuch a great project! Today you're being featured on Friday Favorites! http://homecomingmn.blogspot.com/2014/05/friday-features_9.html
ReplyDelete