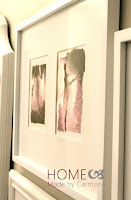
I have been looking for the perfect art for my eldest daughter's room. The difficulty with art is the price, even prints can start to add up quickly. I'm reluctant to spend that kind of money for something of purely decorative value when we haven't even spent money on a much needed mattress, preferably one without springs poking me in the back. Yep, time to get creative.

Do It Yourself Using Clip Art
When all else fails, do it yourself. I'm very particular about my art, and although I can 'kind of' do something akin to painting *grimace*, it just isn't good enough...so I decided to cheat. I went looking for the perfect clip art online and even a few photographs of the kids, and yes I pretty much did a paint-by-numbers job.
Here's How
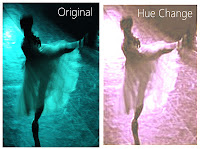
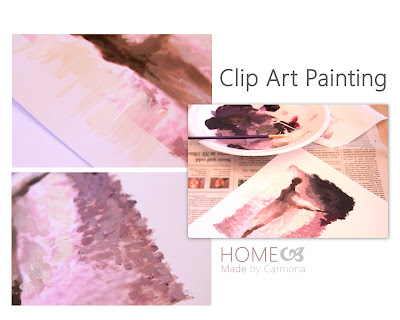
 Copy the smaller image to print rather than downloading an image, the more pixilated the picture the better. Paste into photoshop (or any photo editing program will do) to change the hue to match that of the room you are decorating. Print in color the desired size onto card stock. Paint right on top, to follow the original shading & lighting. Mixing colors to stay as close to the print as possible makes your picture pretty fool proof. It's as easy as that!
Painting Tips
 Experiment with different paint strokes. Small short strokes or dots are the easiest and give an impressionistic air to your painting. I like to go outside the line of the photo, it makes it feel more authentic.
Acrylics work the best, but believe me you can work with whatever paints you have. I've dipped into the kids watercolor bin for a few paint projects myself! I even used a bit of leftover interior paint on this project, well I needed more white paint...
Begin painting immediately after printing, the ink will be fresh enough to mingle and even help tint your paint. Don't think that you need to cover every inch of the photo with paint, the paints blend in nicely with the ink creating a seamless transition between the two.
Add lots of texture. Small globs of paint throughout will ensure no one suspects your artwork as anything less. Plus, the extra texture adds another element of beauty!
Venture out with color. Once you feel comfortable with your new found 'skill', be a little more bold with your paint hue. Just because I love the original photo and colors doesn't mean I can't tweak the shades a bit, or add more highlights. You're giving it your own personal flair.
I got so carried away painting for my eldest munchkins room, I just kept right on... hope I find a space for these little guys. Oh, and the perfect frames!


LOVE IT!!! Thx for sharing your great painting tips. Can't wait to try them out. Heather
ReplyDeleteThank you! I would love to see how they turn out! :D
DeleteThis comment has been removed by a blog administrator.
ReplyDeleteThis is a wonderful idea. I can't wait to give it a try. You have a very precious blog, and some great ideas. I am just loving going through and reading.
ReplyDeleteThank you Pam! I'm glad you are enjoying...lovely supportive readers (like yourself) make sharing just that much more wonderful! ;)
Delete