Hey guys! My super awesome bloggy friend Melissa from A Prudent Life invited me to take a trip down the rabbit hole with her, so I said heck yeah. *Grin* Don't worry it isn't anything weird or inappropriate (although I bet you were wondering why I would squeal my "yes" so quickly). She tagged me in this neat Touring Through Blogland series. That means I get to answer 4 questions, and you learn a bit more about me than you probably cared to know. Then I get to introduce you to a couple other blog friends with a-mazing blogs, then they'll do the same the following week!

But before I share a little bit about me... have you met Melissa? Melissa and Katie (from Addicted 2 DIY) were my roommates at the Haven conference...and well, as girls do (I think we forgot we were grown women with families), after a night of "spilled secrets" and lots of giggles, you can't help but become chummy. Check out her post from last week (I'm in it!!) and learn a thing or two about her. Mmmm, also check out her awesome craft room! Be still my beating crafty heart!
So You Wanna Know About Little Ole Me?>>
·
What am I working on right now?
Well I'm working on eating a delicious butterscotch muffin right now....mmmmmmm, and it's soooo geuoood! I have such a sweet tooth I should be working on reducing the size of my butt rather than scarfing down this muffin. Sorry...totally off topic. I'm brushing the crumbs off my keyboard and getting back on topic. Blog...right.
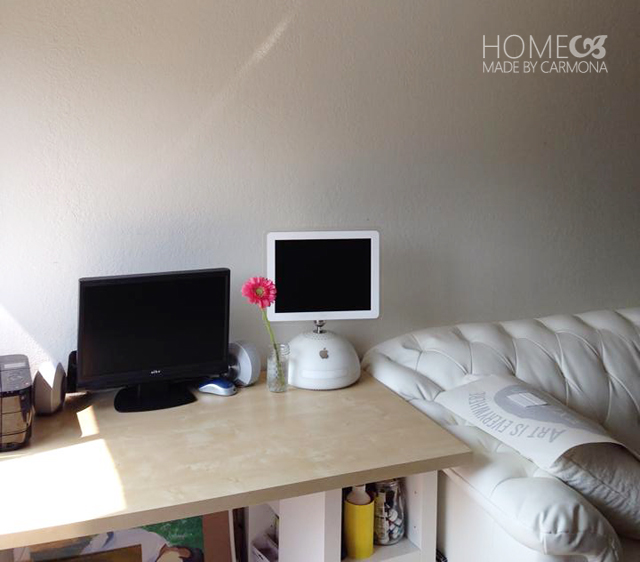
I'm currently working on my home office/craftspace/workspace/sitting room. Yep, this room is going to be the jack-of-all-trades room! I can't wait to show you guys in a month or two (if I can ever finish)!
Just for you (well, and for Tatertots & Jello since I shared it there two weeks ago), a sneak peek at one of my office projects.
·
How does my work differ from
others in this genre?
Besides being probably the cheapest and currently the most broke blogger out there? Lol! Hey, the hubs and I just paid off our house...so we're broke now but "home free" for the future! All our cheapness, hand-me-down furniture, holey clothes, and DIY everything, is going to pay off soon! But that is just one aspect...
DIY bloggers are awesome and I love being in this blog genre, but occasionally I think we have to reel ourselves back in and remember the purpose behind what we do. That is doing it for family. I firmly believe that decorating should be a process married to organization, and organization should be for the betterment of us as people. Believe it or not, I don't make a pretty, well organized space just for looks...I believe in making a space that functions to make some aspect of my (and my family's) life simpler, and enable us as we strive to form positive habits.
·
Why do I write/create what I do?
Besides being an incurable DIY junkie? *huge grin* No but seriously, as I mentioned before, I became a junkie because I have THE most expensive taste, and no decor budget. Can any of you relate to that in one area or another in your life? You gasp with delight at some gorgeous product, then look at the tag and your heart drops because you realize (yet again) that you've been drawn to a brand that is pricey beyond belief. Well I'm guessing our chances of winning the lottery aren't too good (especially since I don't buy lotto tickets, lol!), so my solution has been to make my own knock-off versions of whatever I love!
·
How does my writing/creative
process work?
Well, I've discovered that my shower has superpowers. I go in tired, cranky, stinky, and perplexed...then in the course of a single shower thoughts and words start pouring through my brain, and by the time I leave I'm renewed, energetic, clean, and ready to save the world! I'm convinced the water is magical and infuses me with ideas.
Hmmm, maybe it has something to do with feeling relaxed or rested, because I also have ideas pouring out of my ears after a nights rest. I'm one of those people who wake up in the morning with a thousand exciting ideas coursing frantically through my brain, and I stumble booger eyed toward my computer to quickly put reminder notes for me to expound on after devotions.
Now Meet My Awesome Bloggy Friends>>
Do you know Aniko from Place of My Taste?
Well you should, because #1. she's stink'in awesome. #2. she's ridiculously stylish. #3. I want her house...now. *grin*
Ok, Aniko and I "cheated" a little, and we're featuring each other! See, she asked me to participate when I was planning to do the same! lol! So pop over to her blog today and read her tour through blogland post today.
More About Aniko: She is a wife, mommy of two, business owner, photographer, DIY-er and design lover by heart. In her crazy busy life she always finds herself working on a new DIY project, a craft or perhaps a new room makeover. When she is not projecting, she is busy in the kitchen as she also loves cooking. You can find her mouthwatering recipes on her blog as well.
Do You Know Katrina from Chic Little House?
I met Katrina at Haven, and not only is her blog chic, she is definitely one chic lady! When I heard she was on the Nate Berkus show, I wasn't surprised at all. I'm always inspired by her stylish taste!
More About Katrina: Katrina is a Northern California native, blogging at Chic Little House. Dedicated to bringing her passion for Design, Thrifting, DIY Projects and All Things Home on a budget to all of you. Her goal is to create a home full of character and charm with the perfect blend of style, purpose & sophistication for our casual California lifestyle. She resides in Sacramento, Ca with her husband and two kids.
Do You Know Jessica from Gourley Girl & Guy?
I met Jessica when I threw myself (in extreme exhaustion) into a chair near her at Haven. I think I asked if it was taken...I'm not sure because I'd pretty much kicked my manners to the curb in my haze. Lo and behold, this chica was just what I needed to perk up! In no time at all she had me in stitches with anecdotes! Jessica is chock full of personality...I liked her instantly!

More About Jessica: Hey friends! I'm Jessica from Gourley Girl & Guy and I share a little bit of everything. I'm a teacher who, with the help of my husband (the preacher), tackles DIY projects around our house. We keep busy with the kids from school and church, sometimes in the midst of our projects. Most recently, we've been posting about our battle with infertility and our master bedroom maekover (more progress coming soon)! We truly hope you'll come join us as we blog about all kinds of stuff (the sarcasm and bad puns are free!) and work on making our house into a home. We're desperate to throw a party--and YOU are invited!
Next week read more about each of these incredible ladies from their blogs.
Have a fantastic week!