

I removed the base panel of the washer and let it go through a cycle to see when and where the leaking occurred. Lo and behold, the rubber seal (otherwise known as the bellow) had a long gash in it. I don't even know how it could have happened. Perhaps a wayward pocket stowaway with sharp edges went on a little sightseeing trip through the wash cycle...either way something had turned my bellow into a shredded mess.
How to Replace a Torn Washer Bellow
I own a Maytag 3000 series washer and dryer, and while searching for the needed part online I learned a few things. The most important thing I learned is to ask whether the supplier will match a competitors price. I managed to save $40 on the purchase of this bellow by price matching.

Step 1. Unplug
Seems like a logical first step, but then again, when you're distraught with how much that part just cost you, and why your fairly new washer is doing this to you, well... I'm just covering all the basics! You will be dealing with wiring in your machine, so it is important to make sure your washer is unplugged.

Step 2. Remove bottom panel
You may have to prop your washer atop a couple 2x4's for this step. The bolts are located at the bottom corners, then pull down and out to remove the panel.

Oh, and just so you aren't searching high and low for the proper tool to disassemble your dryer, you already own it: it is your screwdriver minus the screw bit. Why am I saying this, well lets just say it was late, I was still distraught over my still sopping floor, and I might have had an "oh duhhhhhhh" moment myself. *grin*

Step 3. Remove washer top
Remove the bolts that are securing the washer top...usually two bolts located at the back of the washer. It might take a little tug to lift the washer top up.


Step 4. Remove soap dispenser and screws
Push that grey tab down (the one you always wondered what it was for), and slide the soap dispenser out. Then remove the two screws revealed, just to be difficult mine are star shaped.


Step 5. Remove electrical panel & detach wires
Remove bolts, but you wont be able to remove this front panel until you detach the wiring. Unhook the bundle of blue wires, and the bundle of black wires from the panel.


Step 6. Remove spring loop & bellow
Now that the washer top, base, and front top panel have been removed, it is time to remove the washer front with door. Start by unhooking the spring loop from around the outside lip of the bellow, then loosen the bellow.


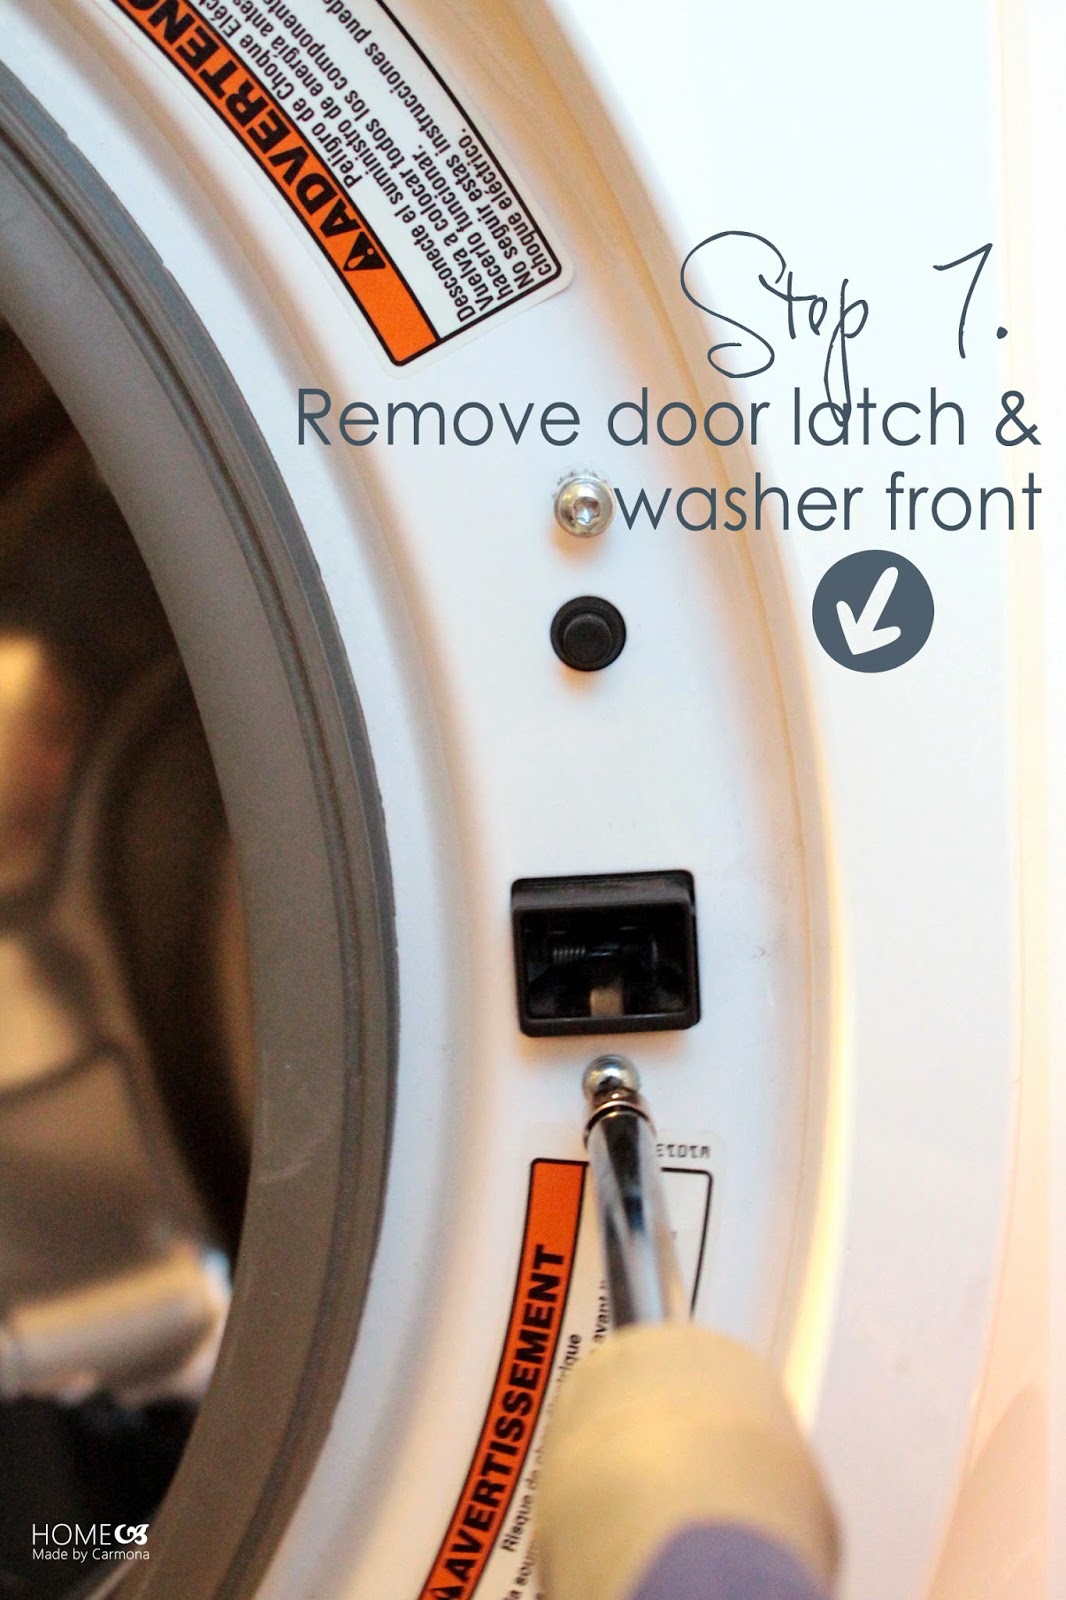
Step 7. Remove door latch & washer front
Using the star bit unscrew above and below the door latch and push the latch through. Remove the entire washer front with door.

Step 8. Unhook dispenser hose and bellow clamp
The dispenser hose should be popped out of the bellow, and the bellow clamp loosened with a flat head screwdriver. Now you will be able to remove the old bellow.

Step 9. Remove old bellow & install new bellow
Be sure that the new bellow fits snugly where the old one sat, lined up with the dispenser hole.

10. Follow steps in reverse to put the washer back together
By the time you are done putting the new bellow on, these are the parts you will have removed to get to it. These are the parts you will need to put back on...I promise it is not as scary as it looks. *wink*

Before you put your washer base back on, take a moment to clean out that nasty little catch-all that filters things out of your wash load. It is disgusting, and will stink to high heaven, but it is well worth it! You should probably make it a habit to clean it once every 6 months or so... eeewww.

What awful timing! So glad to hear you fiixed it though. The same thing happened to my Whirlpool machine. A sweater arm was caught between the door and bellow. I fixed it, but definitely made me dislike front loaders :)
ReplyDelete