Showing posts with label "During" Project. Show all posts

Tuesday, June 17

New Cabinet Pulls Are On!

Uuuuuuhhhgg. Nothing is worst than reaching a hand out to open a cabinet and pulling it away sticky. Well, it's one of the unavoidable messes of having kids...sticky pulls, and dirty fingerprint smudges along wall edges. Clorox wipes are a constant staple in this house for wiping up walls and cabinets knobs & pulls.
That being said, the old knobs were pretty shot, and not just by sticky fingers. The finish was cracked and peeling, and for once the gold of the knobs weren't doing anything for me. Considering the pretty reflective silvery frames I have just put in the laundry room, I thought perhaps chrome pulls would be in order. 

I removed the old cabinet knobs, and filled the holes with wood filler. These old knobs were located rather high up, and I'd like those same little sticky fingers to (ironically) be able to reach out and open the cabinets without having to claw their way up the side of the washer or dryer. My kids end up inadvertently pressing buttons, and often I come in to switch the clothes over from washer to dryer to find a paused load, or have to start a washer cycle all over again. The new pulls will strategically be placed as low as they can go without looking strange!

Thanks to my young photographer-in-training for capturing her mommy in action! My 8 year old has an eye for the artistic *proud grin*. 
I'm breaking in my brand new drill to make holes for my new pulls.

I decided to go for interesting rather than safe and installed the pulls horizontally rather than the typical vertical installation. This allows the girls to be able to grasp the entire pull, and an unexpected ancillary benefit is the ability to hang cloths that need to drip dry off the pull. 

It is a small thing, but taking 20 minutes to install new pulls was a nice simple fix that adds quite a bit to a space.
Wahoo! We're in the home stretch people!! After hanging those gorgeous pictures last week, installing new flooring, and adding pulls this week, all I need is a new light fixture and some accessories and this room will be ready for use again!

Friday, June 13

My Rather Alluring Floors


Whooohoo! Happy birthday to me! I just scored 3 boxes of Traffic Master Allure Ultra in Aegean Travertine at $58 a box, down from the regular $78 per box. I walked into Home Depot (my 2nd home), and there they were...right in the middle of the aisle with a big sign that might as well have said "hey Carmona, buy me". Then a Home Depot sales person walked by, saw my longing doe-eyed stare, and told me I should buy them because it was a good deal. Well, how could I refute her incredibly convincing logic? *grin* Yeah, they were coming home with me. But seriously, there couldn't be a better 32nd birthday gift! I've wanted to redo the floors in my laundry room for a while but needed something I could lay myself to save some $$. 

I have no idea how to lay tile or hardwood flooring (although I intend to learn!)...now, a utility knife I can wield with some skill, so Traffic Master's resilient vinyl tile flooring is just my speed. 
First I have to rip this nasty old carpet up. It is glued down to the concrete, and I'm afraid some patched concrete is breaking up.

I was hopeful I wouldn't have much more work besides pulling up carpet, but now I'll have to scrape off and level any areas that look like this. Thankfully there aren't too many!

A project is never as simple as it seems. I'm always so optimistic that occasionally I fail to properly estimate the time frame and amount of work that will go into a project. Today was clearly no exception. The padding from the underside of the carpet decided to stay glued to its happy place...of which I was determined to part it from. This party is over Monsieur Carpet, you don't have to go home, but you can't stay here!

Thankfully it scrapes off easily without putting up too much of a fight! *sigh of relief*

5 hours later my floors are ready to receive new flooring! Now somehow I have to lay flooring avoiding the washer since I couldn't move it. The dryer was light enough for me to "walk" it out on my own, but this washer is a beast! I wasn't sure even my husband and I together could move it out of the room and then get it back in (apparently we are very weak and may need to start lifting weights). Well my crazy plan is to lay as much flooring as I have space to, then move the washer onto the finished part and complete the rest of the of the installation. Honestly I'm not sure this is a recommended course of action, but this is an interlocking floating floor, so if a few completed rows can't withstand a washer then I'm going to have to question this floor's integrity. (FYI, it passed the test with flying colors!)

If you decide to purchase these stunning Allure Ultra interlocking floor tiles, there is one thing you should know; they are harder to attach than you think. I have installed the non-interlocking ones that stick together easily without incident in my old house. However these travertine-like tiles were a bit of a challenge. 

After carefully reading several pdf instructions online, and utterly failing to get the second row properly clicked in place, I played around with techniques until I learned what worked and what didn't. I started with a single completed row, using quarter inch wood spacers near the wall as required.

Then I created a full second row and attached the entire 2nd strip to the 1st strip of flooring. This eliminated what I'm calling "the angle paradox", where the flooring experts somehow expect you  to angle both strictly horizontal and strictly vertical at the exact same time to interlock the tiles (really ???).  My method worked smashingly well until I reached the cleaning closet impasse, then I was forced to use the angle method. Those particular tiles definitely attached, but the tiles don't hug perfectly snugly as the rest.

To cut tiles to size you simply score with a utility knife, bend and snap. It is really very easy to cut! I may have also cheated a little by using shears to make small cuts and angled cuts, this little trick worked like a charm. 


It only took me 2 hours to install all the tiles, compared to the 5 it took to prep the floor. 7 hours later (and quite a few "aah, my back locked up again" breaks), I was ready to add 1/2" trim around the 1/4" gap required by these floating floors.

9 exhausting hours later I'm finally done! Despite my very red hands, and aching back, I am head-over-heels in love with this flooring. Exhausted I plunked myself down where I could sit and admire my work for a good 30 minutes. 

I wouldn't want to have to install this particular flooring in a room any larger than this one (or with too many weird corners), but it was well worth the effort in my mostly straight-shot laundry room. 
These floors are waterproof, beautiful, and feel great underfoot! It was worth it, wouldn't you say? These are my floors before, then after.


If you missed it, check out the details on the art in this laundry room makeover here.

Friday, May 30

The Living Room That Wasn't...

I've shown you a million small projects I've done to makeover my living room (a million being only a slight exaggeration...well it feels like only a slight exaggeration...I'm exhausted!), and by now you're probably eager to see the finished results! 


Bad news...my living room is as ornery as ever and simply refuses to be finished. I've thrown up my hands in despair and submitted to the decorating-powers-that-be. 


Don't get me wrong, there is a lot of progress.  I've painted artwork for the walls, I've painted the fireplace, I've painted chairs....


I've painted furniture and hardware, and just about everything else.  I'd like to say I've painted walls, but I haven't figured out how to do it with my extremely tall ceilings yet.


When you are working with the ittiest bittiest of budgets, and every little item and design idea has to be a do-it-yourself project (or bust!), then it takes lots of time and revisions to the dream. 


That being said, I've decided to live in it for a bit, refresh my palette by tackling a different room for a little while, then revisit the living room in a month or two. 


I'm hopeful that by then I will be able to complete the other hundred projects necessary to whip this living room into shape.


In the meantime, I guess I've made a little bit of progress... *wink*

Monday, April 7

My First Time...at a HomeGoods Store

I stepped through the automatic doors, took one look around me and whispered "oooooh noooo, I've just been taken hostage...by AWESOME". I know, I know, I'm a nut. See, I've never been in a HomeGoods store before and I guess I had partially expected a shop of antique like trinkets and furniture a grandmother would buy. What was I thinking?? Well now here I was, standing smack in the middle of the doorway, mouth agape, taking in the breathtaking beauty of what could only be my dream shop. I positively floated down the aisles, pausing to ooh and ahh at the pretty goods, then OOOH and AHHH more loudly when I looked at a tag.
I know, I'm a bit melodramatic when it comes to home decorating, but give me a break, I've been pinching my pennies and patiently waiting 10 years to make the house of my dreams! I look for every deal I can get my paint stained little fingers on. 


I'm working on my living room makeover, and boy is this budget a tight one. Well, you were asking where I got these gorgeous baskets you saw during the bookcase makeover reveal. And now you know, for once I sprang for a little something-something for muah! The big basket was $16.99, and the smaller one was $11.99.


How awesome are these? They are perfect for holding my big fabric bolts, and wrapping paper. No more leaning them in random corners of my house then bolting around trying to remember where I left that particular paisley. And if you didn't already know, I'm a huge sucker for pretty wrapping paper...and not because I'm a big gifter (my friends will tell you I'm not), but because they are fantastic for a variety of craft projects. Speaking of which, I also found several cute wrapping paper rolls at HomeGoods.


I'm also excited to have found a pair of 96" curtain panels for half price! Yes, that is $12 for long curtains that will frame the sliding door from my living room to my deck perfectly! *contented sigh*

Hey, in case you were wondering, HomeGoods did not put me up to this, I just thought you'd get a kick out of hearing my first ever HomeGoods experience. I mean, what warm blooded woman doesn't enter a strictly home decor store until she's 31?  *emphatic head shake* Its just not natural. Ok, but it was necessary...I needed to be sure we were complete debt free and had a savings before I introduced myself to kryptonite. Ask me in a few months if we still have a savings... *joking*

Friday, February 7

Chair Happy...

Ladies and Gents, we officially have a Living Room! Because without great seating, you just don't have a living room. 
Remember a week ago when I said I didn't have much luck with seating in my house? Well it seems my luck has changed. Oh happy day! I joined a local Facebook garage sale group and I've been on cloud 9 ever since. No seriously, I'm so happy I've broken out in song, dance...dude I did the moon walk last Sunday when I got my dream couch. Be glad you weren't here to see that, my kids were wide eyed. *giggle* 

My Dream Couch For $400? Pinch Me!
My eyes nearly popped out of my head when I saw this couch listed for $400 on Facebook. Yep, I said $400!!! Yes, it had a few stains I had to get out, and a couple tiny ripped seams in the upper back corner, but I've already repaired them. I discovered muscles I never knew I had cleaning this couch...turns out the Rug Doctor works better than the YMCA...who'da thunk? 


Choices, Choices...
Not only did I manage to score a fantastic couch, I found two swoop armchairs via Meijer online for under $100 each. I wasn't particularly fond of the print, but to pay $100-$300 less per chair, I'll sew a cover for them and call it a day. Then I found these awesome mid-century modern chairs via the Facebook garage sale group for $30 each! Now I have this tough choice:


I like a classy transitional look, but I'm all about shaking things up a little and being my eclectic self as well. I love the swoop armchair, but I'm leaning pretty hard toward the mid-century modern chairs in this particular space. The mid-century mod chairs are undeniably the most comfortable chairs we own, plus it looks more natural next to the couch. The swoops will lock this room in as traditional, and almost makes it feel more show-roomy and less live in. I think I may put the swoops in my sitting room or possibly dining room as they are a bit "stiff" looking. 
I can't believe that inside of a one week period I've gone from icky couch, and no chairs, to style  making seating! 
This living room has hope now people! Next I have some ideas about art and lighting...

Saturday, October 12

Wallpaper, Wallpaper, On The Wall...

Mmmmnnnooooggrrrrbleghhh. Oh hey... sorry about that. I was just looking over the bathrooms in my house and eeeggghhh...huh there I go again. I've been putting off these two bathroom spaces for 2 years because of the wallpaper. No, it's not that it will be that difficult to remove it, it's just that I hate removing wallpaper. I moved here from a house that had 3-5 layers of old outdated wallpaper on every single wall surface. Yes, I said 3-5 layers on EVERY SINGLE WALL! I spent 5 years peeling wallpaper so I am NOT fond of it! After moving into this house, I decided to take a couple years off *wry grin*. Well, at least I can say I have learned a few things about wallpaper removal. Let me tell you, I have done it all... it took a while but I finally came to the conclusion that the simple method is the best.
I can't avoid it any longer, the girls bathroom is especially in need of a little TLC. So I thought I'd take this opportunity to share what I have learned about wallpaper removal while I prep my two bathrooms for painting.

No More Gimmicks
Nothing is more frustrating than spending money believing a product that promises easy and effective result but to no avail. One thing I have learned after trying professional steamers, and myriad of sprays and goo, is that they all have their own unique type of hassle. The reality is that good wallpaper removal can't be guaranteed, the success of removal all depends on the age and type of the wallpaper, and the condition of the wall beneath. No matter what method you use, if something bad is going to happen, none of these methods will prevent it. I figure if you are going to have to pick your poison anyway, and what will be will be, why bother spend the money? Might as well use a free method... 

The Free & Simple Method
I use a spray bottle with warm water, and a taping knife as a scraper. Wait, let me show you...


This may seem overly simple, but it turns out that it produces the same good results on easy peel wallpaper, and the same set of frustrations with old wallpaper or badly primed walls. It's all about learning how to tell what you are up against before peeling, or what to do when the going gets tough. 


You Never Know What You'll Find
Wallpaper removal is a gamble. You might discover multiple layers, with each layer getting older and harder to remove, or it might turn out to be a breeze! Just know that if you decide to remove your existing wallpaper you may have to deal with more than you bargained for.
The best you can do to "check" is use an exacto knife to score the wallpaper near an out-of-the-way corner, and gently peel back that scored segment. If the wall is primed and painted underneath you are likely to have a quick and easy removal. If there is a second layer of old wallpaper without a plasticy substance, or the wall is not painted, you might risk pulling off pieces of drywall, or bubbling of the wall surface.


Avoiding Removal
If you hate your wallpaper, but don't want the hassle of removing it, you do have options... 

Paint Over It: If the seams are tight well done seams, and there is no bubbling of the paper, you can use an oil-based primer to paint over your wallpaper. Be sure to use a brand that is not too "wet" (or at least leave the primer open for a few days to thicken up) otherwise you might create bubbles or unwanted texture that will show up when your top coat dries. 
Wide Seam Tip: If your seams are a little further apart than you like, and you are good at mudding, you can fill in gaps in seams with just the tiniest bit of plaster. 

Paper Over It: I hate the idea of making more layers of wallpaper, but there are times when it is merited. In these cases be sure place your seams fairly close to where the original seams are. Unless the old wallpaper seams are flawless, they can show through the second layer of wallpaper once the glue dries...better safe than sorry.

Solving Paper Removal Problems

Peeling Dry Wall: I hope your mudding is good. *grin* There isn't much that can be done besides mudding over the peeled areas...short of papering over your mishap.

Bubbling Paint: Perhaps the dry wall isn't peeling, but it seems as if paint is bubbling and peeling with each piece of paper you pull off the wall. It may be a flat paint, or it may be that it isn't painted at all. Either way, allow it to dry thoroughly, then use dry wall sandpaper to sand the peeled edges. In some cases that will take care of it, in others you may have to use a light coat of plaster and mud around the edges to hide any irregularities. 

How to Remove Paper Around Impediments: Bathrooms particularly can be difficult to remove wallpaper from because of all the impediments; the toilet gets in the way, the light fixture, the vanity, towel bars, etc. Rather than removing every fixture, lightly score around these items using an exacto knife before peeling back the wallpaper around it. 


Good luck with your wallpaper removal! I hope your experience is smoother going than mine! *wink*

Friday, September 6

Creating An Ideal Coat Closet Layout

Well, my coat closet is officially underway! I can't wait to start decorating and organizing it...but ok, let me not jump the gun. I should probably start by getting the closet layout complete, and maybe get a paint job in. This closet has got to work for me baby! I want our exodus from the house every morning to be positively seamless, and I'm counting on this coat closet to make it so. *giggle* Think I'm asking too much of a room? Yeah, ok maybe, but a mom's gotta try! 
  
Closet Accessories
Most people start a room with a piece of fabric for inspiration, or even a great piece of furniture. What do you start with for a coat closet? A nice coat? Well call me unconventional, but I find baskets inspirational for organization as well as design. I might have gotten a little lightheaded with happiness and excitement when I saw that these dark woven baskets from JoAnn Fabric store were 50% off! Then add a 30% off coupon from Michael's (an accepted competitors coupon that included sale items), and I was complete. I paid $2 and change each per basket, and I could just envision them set against a beautiful blue-grey wall on a shelf somewhere. Inspiration, set, match.


First Things First...
Clearing out this awful closet and simplifying is first on my list. Yep, that means donating old coats we never use. I was horrified to try on two of these coat and realize I couldn't even button it! Shucks, the hubs and I could stand to lose some weight, in the meantime, the coats can't stay here...I might as well be realistic, I'll never be 21 again. 


Next a Coat of Paint...
No coat puns intended. *corny...roll of the eyes*
As usual I'm pinching my pennies, so I  decided to dip into my "already haves". Some time ago I found two gallons of this Walmart paint in the 'oops/discount paint' section and snatched it up. It cost $8 (as opposed to the usual $16) per gallon, and I figured I could tweak the color if necessary. Now I had a place for it to go! (Ok, so I may have already used most of it in the master bathroom and garage...)


I wish I'd taken a better pic to show you the full paint job. I decided to paint the bottom 3/4 of the closet and leave it white above the shelf support.


An Effective Layout
I hate how things seem to get lost in the coat closet Bermuda triangle of doom. The double wide, double deep shelves above my hanging bar cause items to disappear into the murky darkness behind, never to be seen or heard from again. Ok, maybe a bit melodramatic, but you get the idea, if I can't see or reach the stuff that gets pushed to the back of the shelf, then it isn't organized. At a minimum, I need to be able to see what is back there.


My solution? Remove one of the two shelves that make it deep, and relocate it to that useless space looming above. At least now I can store items never used where I can see and remember they are there. 


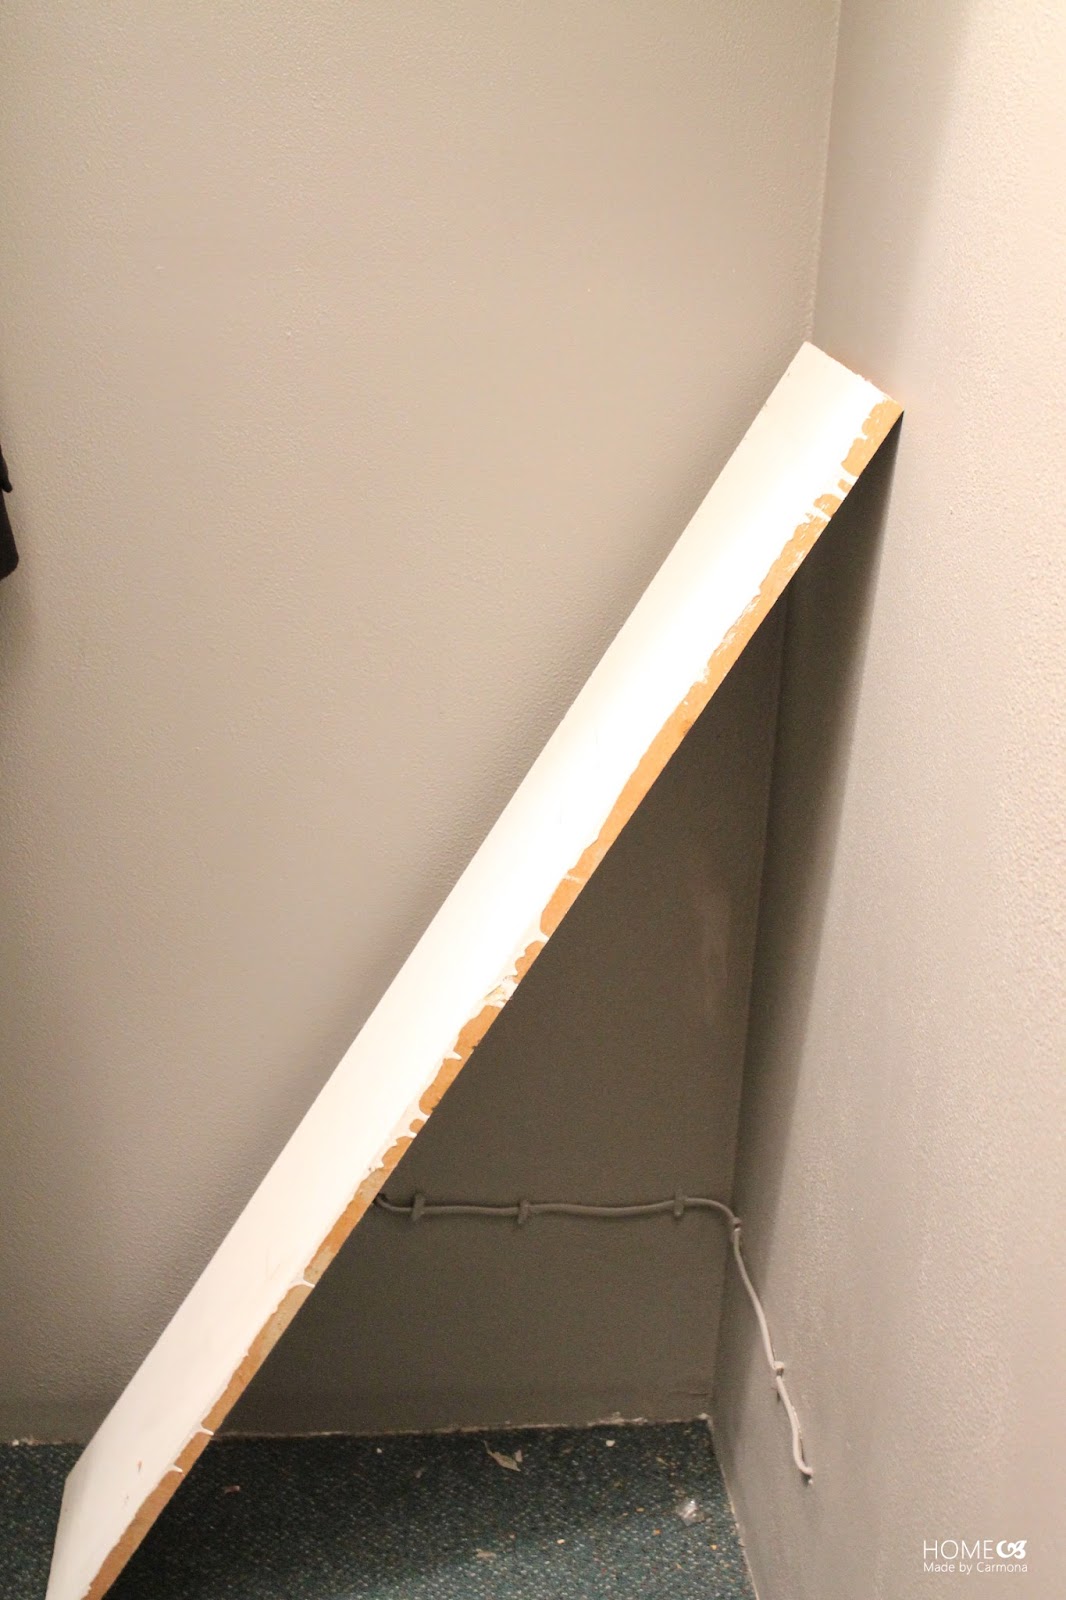
I added two wooden supports to either side of the closet to hold up the new 2nd shelf above. I may have cut corners a little...no, I mean literally cut corners. See how the wood doesn't actually reach the back wall? A hazard of using leftover wood from other projects. However, I tested it extensively and determined it would do the job more than adequately. A coat or two of white paint finishes up my new shelving.


Shoe Shelf
Of course, shelves above are fantastic, but lets not forget the shelves below. A great spot to stack shoes, always necessary in my house! 
I happen to have these two brackets sitting in the garage, and this salvaged piece of wood, and lucky for me they both are the perfect size for an easy install shoe shelf! I attach the brackets to each end of the wall, and clean up this wooden shelf with a good sanding and some paint.


Add Practical Storage: Hooks!!
I may have hanging space (which is important), but I've got to be realistic, I'm not going to be able to get my husband to hang up his jacket every day after work, so hooks for him and the kiddies just seems like a smart move. I'll find some other hill to plant my flag. 
I'm not one to waste, and this closet already had three perfectly good hooks in it, so I just moved them to one corner of the closet. These are the perfect types of hooks to hold my husbands heavy jacket without it falling off. 


I also found these dandy little fellows on sale at Lowes! That made me happy since buying a ton of hooks can cost a pretty penny! (What's the deal with that??) These hooks are perfect for handling hats, scarves, keys, the umbrella, my purse, whatever needed before heading out the door in any weather. 


With a wall full of promising hooks, things are coming along nicely. I love that I get to have the best of both worlds... room for both bar hanging as well as hooks, shelves to store items, and plenty of space to organize the million different items my coat closet has to house. 

All these lovely hooks are high up out of the reach of the munchkins, but I have a fantastic idea for kid height storage I'll start on next!