Showing posts with label Before and After. Show all posts

Tuesday, July 8

The Front Door That Hits Me On My Way Out

  If the multi-toned yellow, beige, and pink walls in my hallways aren't bad enough, the sage front door really hits you on the way out...and not in a good way.
It's time to break out the paint, in a really big way. 

I love a great paint-over, in half a day you can have an entirely different space! See this awful before of my entry hallway? *gag* Now do you see what I mean by bad multi-toned colors?

Sadly the door from the outside is nothing special either. It really lacks personality and style...not the greatest first impression when guests come a'knocking. 


My front door is getting a much needed style boost with this fantastic new product from Modern Masters called Front Door Paint. They have this really neat App for iPhone and Android  that allows you to see the color in action before committing. Perfect for a person like myself with huge paint commitment issues. I usually have to paint an entire wall before I know whether I like the hue or not... this App allows me to make a choice without having to paint half the door 3-4 times! 

I chose a stunning blue called Peaceful from their emotion based color wheel selection...after all, with three kids, I need all the peace I can get! *chortle* That and I'm just a sucker for all things blue...
 

I realize that it is unconventional to paint the door both inside and out the same color, but why not use your paint to its fullest? Waste not want not... Plus I love this paint! It goes on easily, dries quickly, never fades, and there is enough to paint several doors! So painting the inside and out seemed like a no-brainer. 


2 hours later, I have a new door inside and out, and another 3 hours later my hallways stopped looking like someone puked in my house. I selected a light grey for my hallways to match my new "peaceful" vibe.

Well, what do you think? Huge difference right?
I still have plans to swap out the light fixtures, and perhaps do a little accessorizing both inside and out, but I may stop at this paint-over for a little while and just enjoy it as is! 


If you want to give your front door an update, Front Door Paint is available at selected Lowe’s and Ace Hardwares as well as online via Amazon or the Modern Masters online shop.  

If you are loving my new front door, I have great news for you... you could be the owner of your very own selection of Front Door Paint!! I'm running a giveaway right here on the blog! Someone is about to up the ante on their exterior. ;)

Thursday, June 26

Laundry Room Reveal

I'm SO happy with my laundry room. It functions like a dream (finally), and rather than being the blight just off my dining room, it is now a space I can allow my eyes to linger on rather than rush past. Ha, I no longer have to be embarrassed if I forgot to close the laundry room door when guests take a seat for dinner! I call that major progress. 


Remember what it looked like before? That ironic dingy mustard paint color on the walls... I mean c'mon, who wants to think about dingy mustard yellow when trying to get bright clean laundry?? Here is the laundry room right before we moved in, and my original plan (which clearly got tweaked a bit!):

Like most spaces in my home my laundry room has been a bit of a process. My first update was painting the walls and bringing in front loaders, then nothing for a year-and-a-half. Until that glorious day a month ago when I saw my dream flooring on sale at Home Depot! Travertine-like flooring I could lay myself? Uh, you should have seen my giddy dance right there in the Home Depot aisle. 

Then everything just seemed to fall into place...from finding these sparkly chrome frames, and prints at 25 cents (total...not each!), to finding the perfect accessories and that gorgeous Kichler light fixture.


The Practical Side of the Laundry Room
I like a beautiful space as much next decorating junkie...but this mama lives here, and I am all about the practical side of decorating! 

The best part of this laundry room is the oodles and oodles of storage! After all, where else am I going to store all my household cleaners?

Swapping out the old cabinet knobs for these modern pulls helped update the space without removing cabinetry.

 A row of medium sized cabinets across the top hold detergent, cleaners, and everything you can possibly need for the healthy home. I also have four large baskets that sit atop the cabinets to store extra tissue, toilet paper, and paper towels.Then the small pantry-like cabinet to the left of the dryer houses brooms, mops, my vacuum, and other cleaning tools...that is an entire post in of itself! 

The only items I keep out are frequent use items like these spray bottles containing ingredients for stain removal. 

The kids know that the moment they get a stain, they are to spray the stain and place the soiled garment into the laundry utility sink for soaking.

Having a utility sink in the laundry room is FANTASTIC! We clean everything in there... muddy boots, paint brushes, you name it... which is why I installed a trio of hooks right over the sink; it makes the perfect place to allow rags and paint brushes to drip dry.

Atop the washer and dryer I keep my regular use sprays inside a sleek porcelain tray. This is my catch all for miscellaneous items found in pockets, or that need immediate attention on laundry day.

I also a trio of small white dishes for the items that may not need immediate attention, but can house those small items often found in the washer or dryer. Buttons that are discovered in the dryer, but I'm not sure which item of clothing they belong to stay here until the needed.

I also keep three small baskets atop the dryer to store common use items such as a mesh bag for delicate's, rubber gloves, and the all important chore checklist sheets! When the kids come to collect cleaners they also grab the appropriate checklist for the room. By the way, these checklists are a lifesaver! I provide free printables here for you.

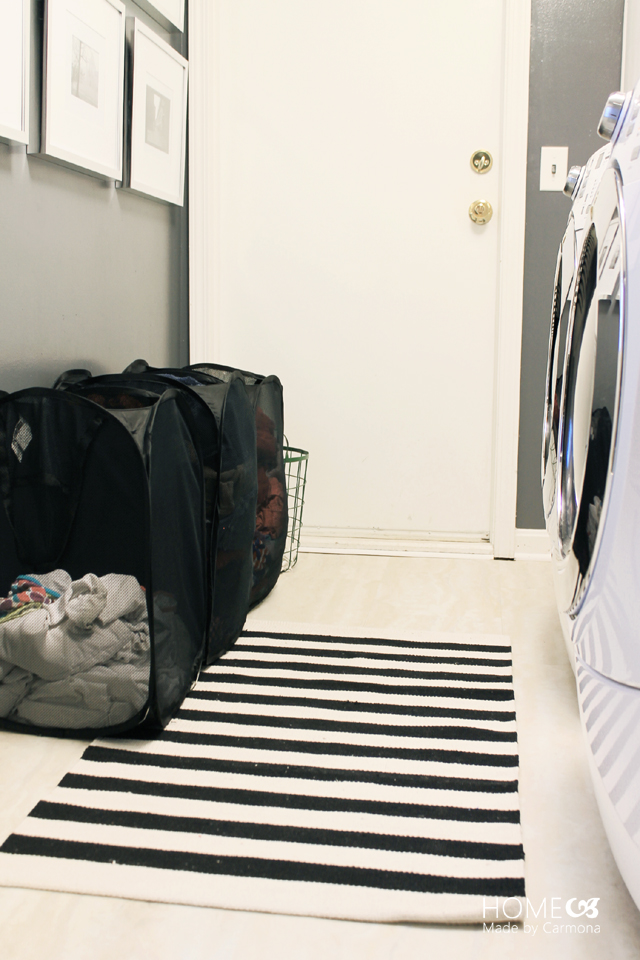
So are you wondering where my laundry baskets are? That little green basket can't possibly hold all our dirty laundry, so what's the deal? *grin* Here is my tip for keeping a tidy well-decorated laundry space, and keeping it practical as well!
I use pop-up laundry baskets for dirty clothes, and smaller ones to carry my clean clothes. They are brought out on laundry day and we all bring our hamper/baskets from our various rooms and sort them into these pop-up baskets

At the end of laundry day, I simply fold them flat, and tuck them into the space by the dryer. Safely in their slot until next week and another laundry day! It keeps the floors in my small laundry room clear...very important since this is my indoor path to the garage and I often lug furniture (and tools) through here to be worked on.

The only basket that stays out at all times is this stylish little green basket I got from Home Goods for $12. It collects the dirty rags used to clean windows, wipe up spills, etc. throughout the week. It is allows them to air out, and dry between laundry days. 

I store my clean folded rags under the utility sink in this beautiful white basket I embellished with gold spray paint. Chrome may be the main finish in here, but my new favorite thing is to bring in hints of gold or copper in to each space! 


I was overjoyed to find these hooks at Target, marked down from $8 to $1!! Adding a couple hooks to temporarily catch the hubby and kids belts, hats, and unwashables they forget to remove before tossing in the laundry hamper.

My mom gave me this nifty little hanging doodad. It hooks over the door, receives hangers (for clothing that needs to air dry, or be hung up straight out of the dryer), then folds down when not in use.

I hope you enjoyed my laundry room tour! I'm lucky to have a space of this size to commit to my laundry, 9'x6' to be exact, and I'm making the most of it! However I have learned that if all I had was the space above my washer and dryer, this is the layout I would go for... open shelving is desperately beautiful, but I love being to adequately store household items and enjoying stylish decor at the same time.

Monday, June 23

Installing a Light Fixture - My Laundry Room Lightup

I have one final project to brighten up my newly updated laundry room, and it is installing the beautiful new light fixture I just got from Westside Wholesale!
Isn't she a beaut? Replacing the lighting in a room can be a quick and easy update that makes a big difference! So today I'm sharing how to install a light fixture and giving you a sneak peek into my laundry room makeover.


The old fixture seems to be having a bit of a tough time keeping this room well lit. With space for only a single bulb, and a low wattage bulb at that, it left much to be desired.

The new fixture I've chosen for this space is a Kichler Transitional Semi Flush Light Fixture, and it has a bit of sparkle that really adds a streamlined glam I'm looking for in this room. It was really important for me to find a fixture that made a subtle statement, so the size was very important...this particular Kichler fixture measures 15" x 11.5" making it perfect for my 9' x 6' space. It will stand out, yet not take too much attention away from the rest of the space. Ever the practical decorista I also made the number of bulbs a criteria for my search. 3 bulbs were perfect to brighten up the space!

While looking for the perfect light fixture I learned that not all lights are created equal. Here are a few things to keep in mind when purchasing the perfect fixture:
  • Decorative lighting vs. Bright light: Sometimes we get sidetracked by style...remember that if it is the primary source of light, you want to choose a fixture designed to adequately illumine the space. Look for something that supports a higher wattage and/or has the specs for multiple bulbs. Sometimes you can find the same style fixture in a variety of sizes to suit the task at hand. 
  • Size for the space: Consider visual weight. If the fixture engulfs the room, or alternately appears significantly dwarfed by the space, you need a new fixture. Lighting should not be overlooked as a decorative element, it is equally important to help pull the entire space together.
  • Directional Lighting: From ceiling mount, to wall sconce, to floor lamps and everything in between, your choices will come in a style that directs the light up, or down. Occasionally (such as with a shade) the light will incorporate both an upward and downward glow. Consider the location of the light and its purpose; If you want an item in the room to be illuminated (such as art, bookcases, the stairs in a stairwell, etc.), look for downward illumination. If your needs are more for general lighting to brighten up the entire space, up-faced lighting bounces off the ceiling and tends to flood a room more adequately. 
  • Mix & Match: The different types of lighting you can bring into a space will lend itself to a variety of important elements. Mood lighting, task lighting, general lighting...each have a part to play. Remember that there is no need to choose one over the other, you can combine general lighting with a companion for mood lighting as well! Go on, have your cake and eat it too!


One final tip...before shelling out the big bucks to install your new fixture, why not give it a try on your own? Notwithstanding random quirks such as massively high ceilings, it is a project that can usually be done in a short period of time, and just about anyone can do! 
Watch my youtube webisode here on installing my new fixture in this space:


Here is that sneak peak into my laundry room I promised, but don't miss out on the big reveal! I'll be sharing all the before and after's, as well as tips to decorate for the practical needs of the laundry room. See you there!


Sunday, December 8

The Two-Day Powder Room

We like to believe that it is our biggest rooms that have the greatest impact when it comes to decorating, but I find that it's the small spaces that I love to makeover the most. First off, who says a small space can't have a big impact? And then there is the benefit of completing a small makeover in a day or two and feeling that sense of accomplishment with a fraction of the money in a fraction of the time. 


Powder Room Before
Let me start by saying that there was nothing terribly wrong with the function of this bathroom. It functioned just fine, and I suppose some people would have liked the wallpaper. However one of my little girls took it upon herself to be "helpful" and prematurely peeled the curling wallpaper border along the base. *sigh*...kids. I suppose that means it's time for a makeover, and guess what little person has to do most of the low wallpaper peeling? Do the crime, do the time! 


Wallpaper removal took a grand total of 2 hours using some simple steps you can read about here. 


Lately I've noticed I seem to have gained an obsession with dark walls...I've probably pinned a hundred incredible photos of gorgeous charcoal and navy colored rooms! Mmmmmm, a nice dark navy with big bold pieces of gold leaf art.... *drool*  Well I decided to indulge that obsession, just a little bit. *grin* It's a small space, so it can't hurt! You can imagine how thrilled I was to find a deep blue Glidden paint color in the oops/discount section at Walmart for $12... yes, that is 50% off the regular price! Cha-ching!!

Of course, those big blue walls just don't do justice without being complimented by some art to make them both pop. I found deeply discounted frames at Joann's Fabric Store and spray painted them with Krylon metallic gold paint.


These lovely prints I found free online at vintageprintable.com . For the elephant print go here, for the giraffe print go here. 
Accessories
Target is my kryptonite. You should have seen me with my little $10 Mypoints Target gift card, flying around the store in a blissful tizzy, my 3 kids in tow. I kept putting items in the cart, then running them back when I found something I wanted more! *giggle* 
I finally settled on this marble salt bowl priced at $3.98 marked down from the original $7.99. Forget the kitchen, this would be my ideal soap dish!


I also found this awesome metallic soap dispenser at Target for $12.99, but it rang up for $9.99, and when I told the cashier, she just shrugged and said "that's what it rang up for". Be still my frugal heart! *beaming* After using my $10 gift card, I only had to pay for the marble dish and the rug!


While working on the upstairs bathroom I painted some decorative bowls a gorgeous metallic gold, and while my trigger finger was gold paint poised, I painted one extra little Goodwill bowl just for good measure (or because I'm now obsessed with this gold paint...you choose).


I had such a great time making DIY Lulu & Georgia inspired rugs for both of my bathrooms, but I particularly love this Dot rug. Thanks again to Target's kitchen section (ha! there is more kitchen in my bathroom than bath goods!), I was able to find a plain mat for $7.19... that makes this DIY rug an inexpensive winner at $9!  


Powder Room Budget Breakdown: 
Keep in mind that I just made-over my girls Jack & Jill bathroom on $83, so this bathroom needed to be...well, cheap. Here are all the details on how I refreshed this little 1/2 bathroom on a total of $36!


  • Bath Rug - $9: Target rug, $7.19 (after 10% reduction for damage). Folkart acryllic paint from Walmart $1.77.
  • Wall Art - $10: 2 frames from Joann Fabric Store (60% sale off + 25% off coupon) @ $4.89 each. Prints $0 (prints found online, Staples enlargement 49 cents each before staples rewards).
  • Accessories - $5: 1 soap dispenser from Target $0 ($9.99 before using a $10 Mypoints gift card to Target). 1 marble salt dish from Target (marked down) $3.98 ...(minus a 5% discount). 2 bowls/dishwear from Goodwill 50 cents each.
  • Wall Paint - $12: From the "Oops" discounted section at Walmart (was 50%)
  • Miscellaneous Project Materials - $0: Already owned. Includes painting tools, and spray paints.